It’s important to display the logos of your clients you worked for because it will help your potential customers to trust you and inspire them to take service immediately. Eventually, it will boost your business growth.
In your WordPress website, you can create a logo slider section in no time with GS Logo Slider plugin. GS logo Slider is one of the best WordPress Logo slider plugins. It is a pretty simple process. I will show you how to create a logo slider in WordPress Website step by step.
Well, you are ready by now. Okay, now, let’s dive in!
Step One – Install GS Logo slider Plugin
Firstly, let me show you how to install the plugin. First of all, Go to the dashboard of your WordPress website. To install the plugin, navigate to the Plugins tab on the left sidebar and then click Add New.

Now to the right, place your cursor on the Search Plugins box. Type GS Logo Slider. Once you see the plugin in the search list, hit the Install Now button. Now click Activate.As soon as The plugin is activated. on the left sidebar, you can see a new menu called GS logos.
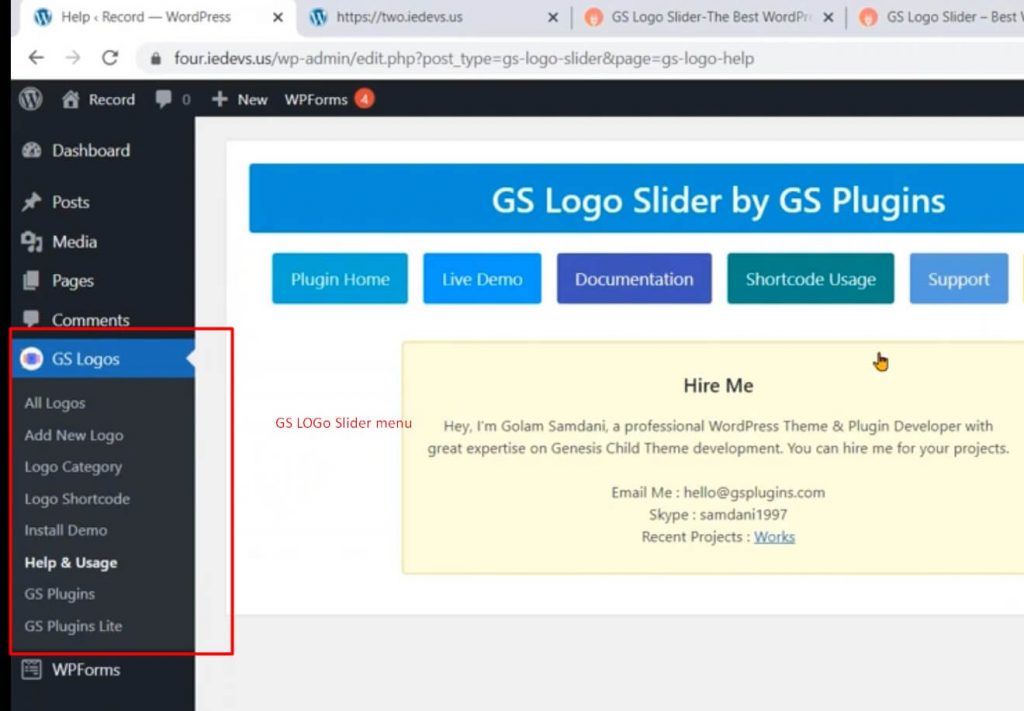
Step number one is completed.
Step Two – Import Demo data
Now, step number two: importing demo data which includes a few logos and shortcodes.
To do that, Click Install Demo.
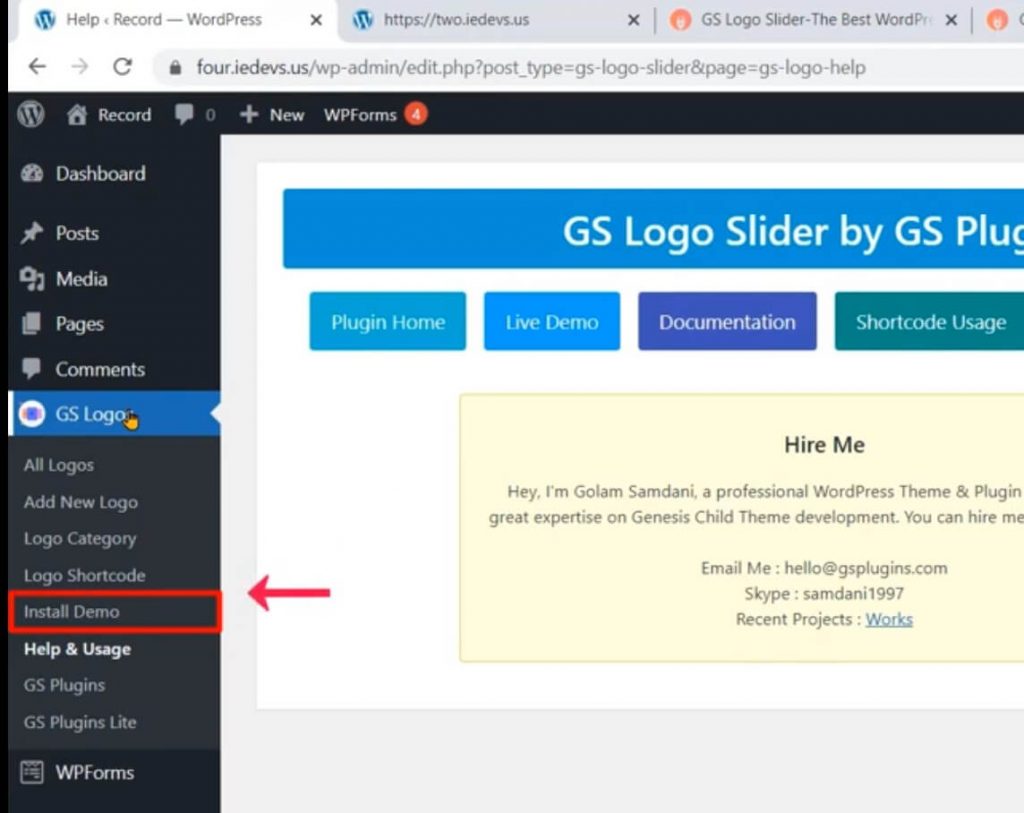
Now click this Import Now button. Wait a while it’s processing. All the data has been imported.
Let’s now hit the All Logos tab. (scroll down) And these are the demo logos we just imported a few moments ago.
(scroll up a little) So the second step of this Tutorial which is importing demo data is completed as well.
Step Three – Add Logo
Now onto Step number three. By this time you could create a logo slider in WordPress Website. But If you need to add your own logo instead of the placeholder logo images. You need to add a logo like the way you create a post or page in the WordPress Website.
This time I’ll add a new logo. It belongs to one of our clients. Let us hit the Add New Logo tab.
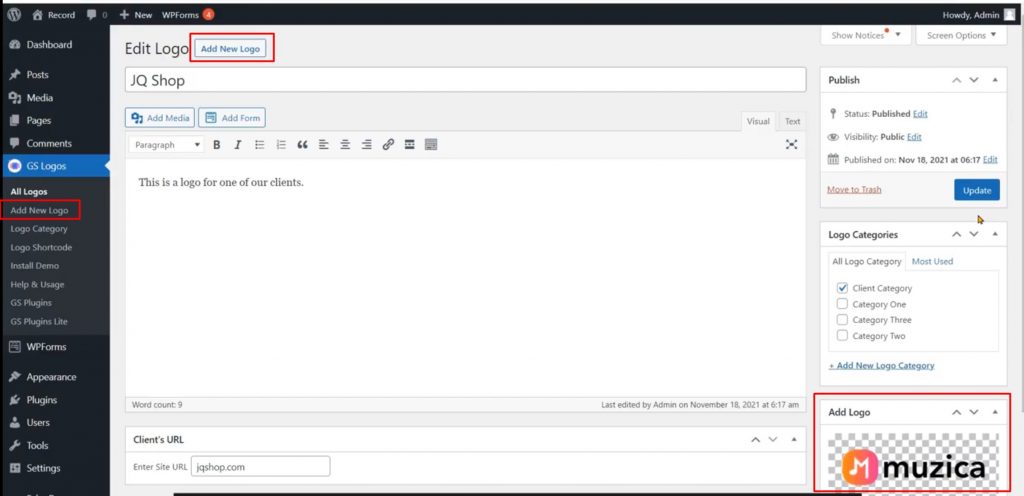
Here we see a new interface to add a logo. So the GS Logo Slider plugin comes along with a custom post type.
Okay now, let’s enter the title of our new logo. Let’s say it’s JQ Shop.
Now let’s use this box to describe the new logo. Let’s type the description. (Type This is just a logo for one of our clients. )
Now let’s enter the site URL which just happens to be jqshop.com.
Click somewhere else and the URL is set.
Now explore the existing Logo Categories here. There are a few categories here. Unfortunately, none of them serve our purpose. So let’s add a new logo category. (click the link)
Let’s name it Client Category. No parent category is needed.
Now click the Add New Logo Category button. The new category has been added, as you see here.
Now the most crucial part: let’s add the logo. Click the Add New Logo link. Now switch to the Upload Files tab. Click the Select Files button. Let’s choose this image. Now click Open.
The new logo is selected.
Now hit the Add New Logo button. As you see here, the image has been added.
Now we are all set. Adding a new logo itself is a very easy and short procedure. So let’s hit Publish.
Our new custom post which is a logo has been successfully published.
Step Four – Edit an existing Logo
Now step number four: I’m going to show you how to edit an existing logo.
Let’s hit the All Logos tab. (scroll down if needed) Here are the existing logos including the latest one, we just created.
Let’s edit this logo. As we hover on it, we get to see the links Edit, Quick Edit, and Trash. Let’s click the Edit link.
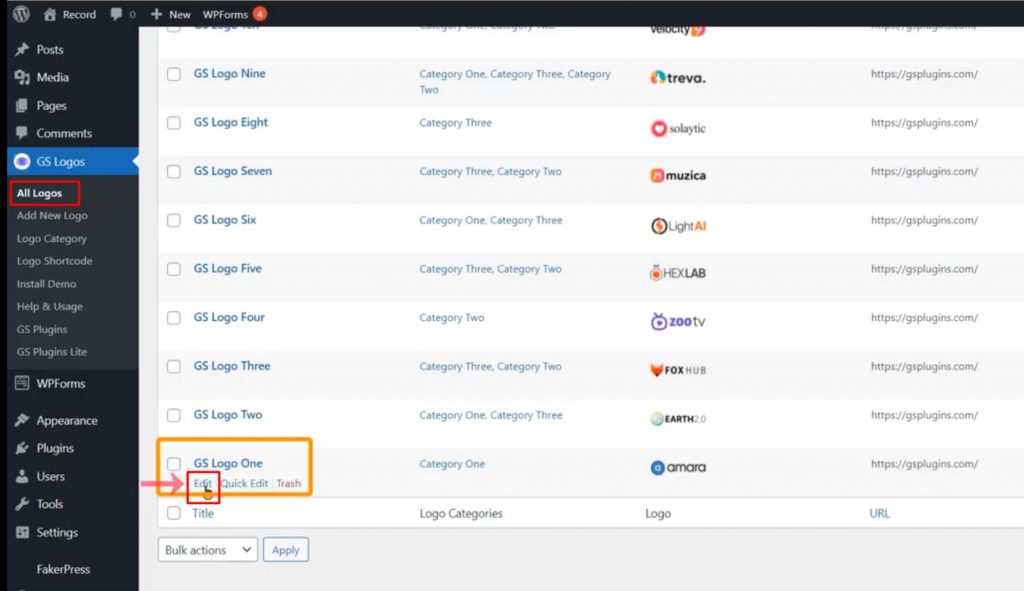
Here you can change the title of the logo (add edited). You can also change the description, the client’s URL, and the category, and edit or change the image.
Here editing an image means clicking the image and changing these fields for the image.
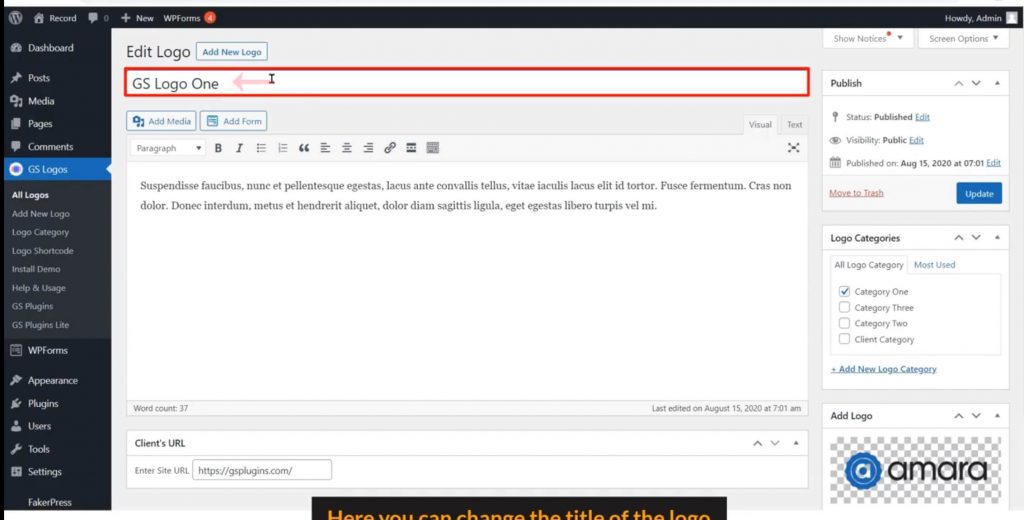
If you want to change the logo altogether, simply remove the current logo first and then upload another. I showed you how to upload a logo a few moments ago.
Once you have done all the necessary changes, hit the Update button.
The logo custom post has been successfully updated. Here ends step number four of this video tutorial.
Step Five – Displaying the logo slider on a site
Now let’s start the fifth and final step of the training. I’m going to display a logo slider on a page of this site.
To display a logo, first, we need to copy or create a shortcode. Let’s navigate to the Logo Shortcode tab (scroll down). These shortcodes are from the GS Logo slider developer team. Let’s hit the Create New Shortcode button.
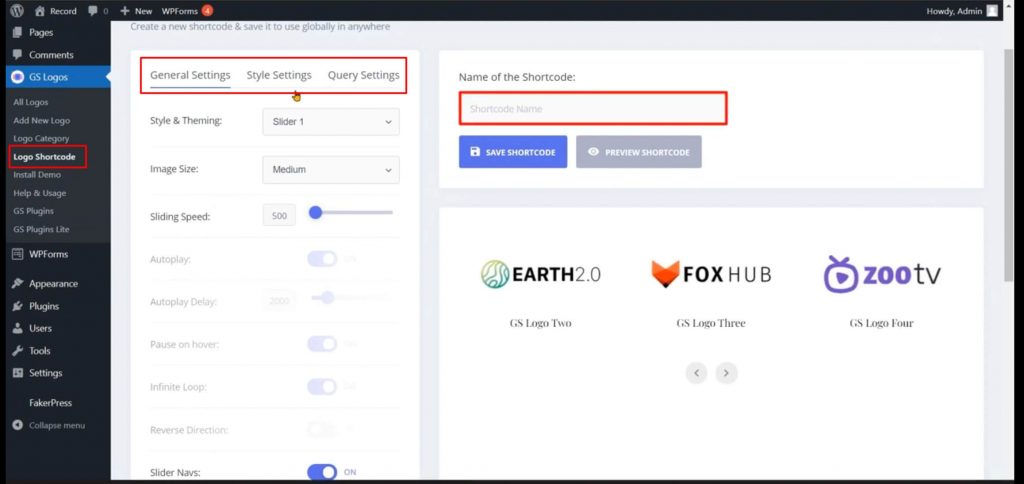
Now let’s name the shortcode as the client logo. Hit the Save Shortcode button. Here is the newly generated shortcode.
Now I am going to show you how to configure the setting options for this shortcode.
There are three types of settings here: General settings, Style settings, and Query settings. Let’s start with general settings.
Let’s click the Style & Theming dropdown list.
The GS logo slider plugin has a lot of style & theme options. However, you can use only the first four themes in the free version. To unlock the other amazing features, you can purchase the Pro version of the GS logo slider.
Check the video description to get the plugin’s link.
Okay, now let’s get back to the tutorial.
The first four style & theming options are Slider 1, Grid -1, List – 1, and Table – 1.
Since we’re planning to create a logo slider,
let’s keep the default which is Slider 1.
Now the image size dropdown list. The available options are Thumbnail, Medium, Medium Large, Large, etc.
->Let’s choose medium.
Now adjust the sliding speed. Let’s slow it down a little bit by making it 1000.
The slider navigation is on by default.
I would like to have the navigator activated.
So let’s keep it on.
I want to have the navigator below the slider. So let’s choose Bottom as the Navigations position.
I don’t want to display the logo title. So let’s turn it off.
Now switch to the Style Settings tab.
Let’s set the logo style as default to gray.
Use these three options to set the number of logos you want to display at a time. Three options for three types of devices. Let’s change desktop logos to 6 and keep the other two as they are.
This option is about how many logos you want the slider to move at a time. Currently, it is 1, as you see here. Let’s keep the default.
Now when you click a logo, whether the associated webpage will open in the same window or a new tab is determined here. Currently, it is set to New Tab. I prefer this, so let’s keep it.
Now let’s switch to the Query Settings tab. Here you can set the maximum number of logos you want to display in the slider, set -1 for all logos. Let me do the same.
Now you can choose one between descending and ascending orders. Since the descending order is the standard one, I’m going to keep it.
Here’s the order by option. By default, Date is selected. Let’s change it to Logo Name.
And in this box, you can choose to display a particular category of logos. I like to display all logos regardless of their categories. So I keep the box blank as it is now. Now let’s hit the Save shortcode button once again. The shortcode is now updated.
Now let’s see how to add this shortcode to a page. Let’s copy it. Now let’s navigate to Pages on the sidebar. Let’s edit the homepage. Let’s see where we can place this shortcode. (scroll down and up) This seems to be an ideal place. Let’s click this block.
Click the vertical three dots. A menu shows up. Now let’s hit the insert before tab to add a new block.
Click the black plus icon. Search for GS logo slider.
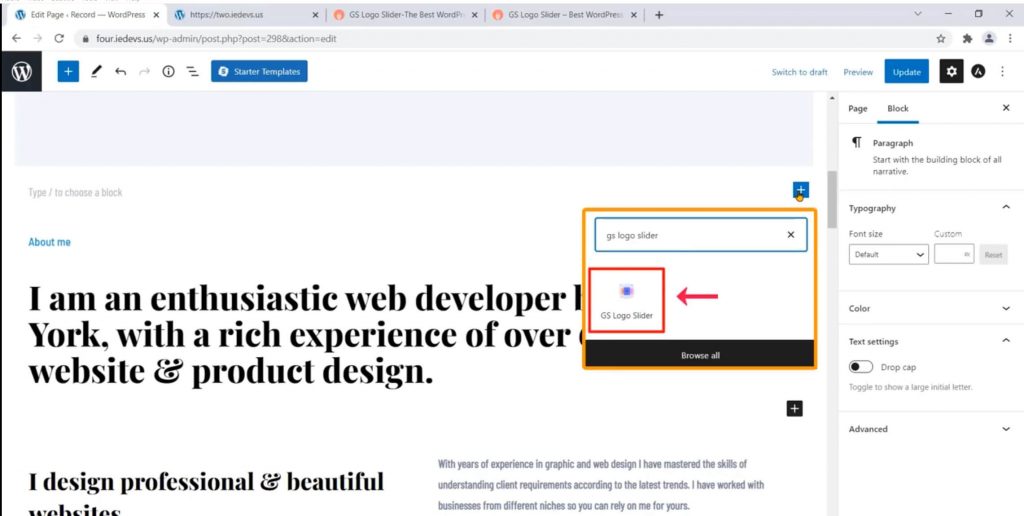
Let’s choose the Block. Now click this dropdown list and see the available shortcodes. Let’s choose this shortcode to display.
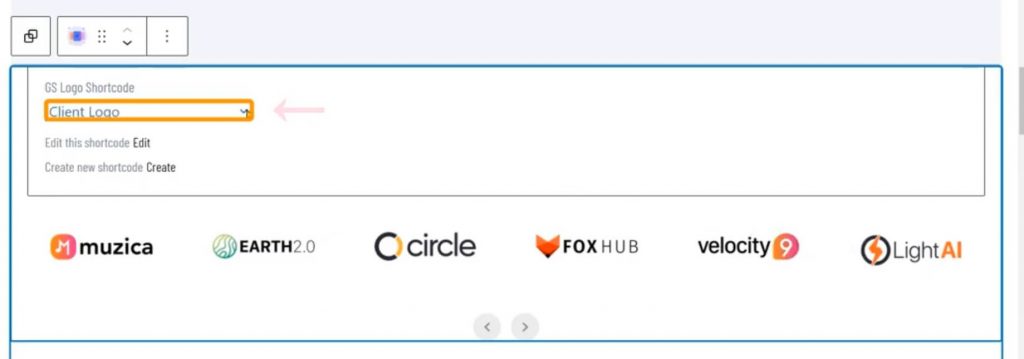
Now hit the update button. Let’s view the page. And here is our logo slider, nice and smooth.
Okay, guys, I believe now you can create a new logo slider and display it on your site. So that’s all for this tutorial.
The free version of any WordPress Plugin has feature limitations. If you want more themes and settings to create and display a logo slider in WordPress website, you should upgrade to the pro version of The GS Logo Slider Plugin.
Please check the link below to upgrade to the GS logo slider Pro version Upgrade
